Service trigger
Introduction
The trigger tab is used to define how and when a service is triggered to run and synchronise data:

Two trigger types are available:
Trigger schedule
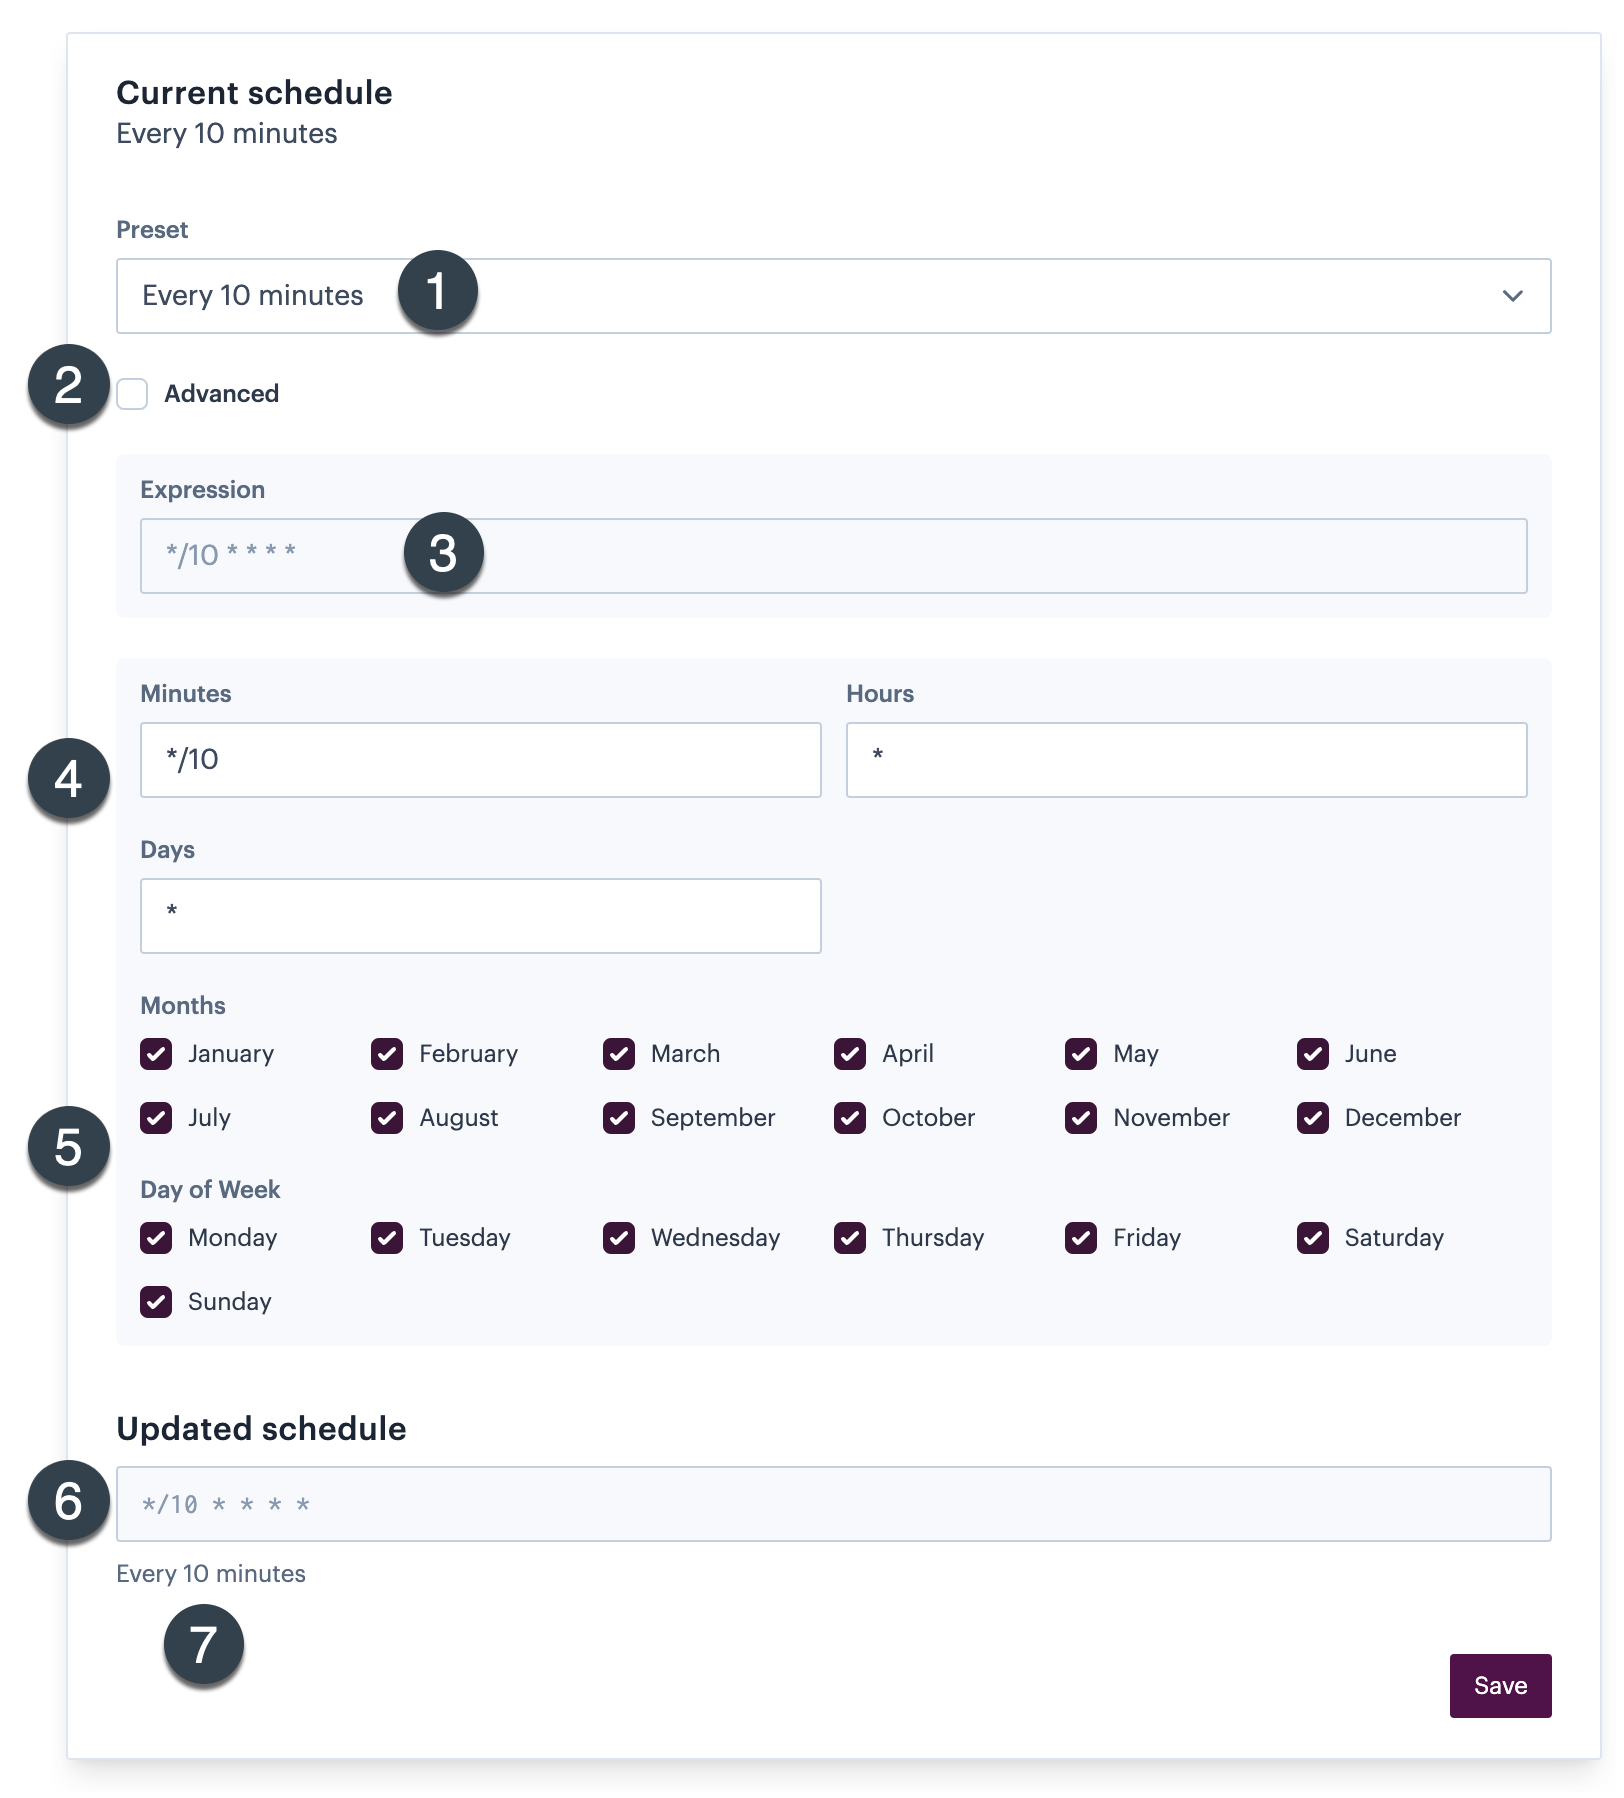
Trigger schedule options are used to schedule the associated service to run at a specified frequency and/or time. Here, you can use intuitive selection options to define your requirements or - if you are familiar with regular expressions - use advanced options to build your own expression:

Notes to help you use these settings are below:
1
Preset
Use this option to select a predefined time period (e.g. every 2 hours). Even if you don't see the exact period that you'd like, choose something similar and then update the minutes, hours and days fields further down.
2
Advanced
If you are familiar with regular expressions, you can select this option to activate the expression field beneath and enter your required expression directly. When an expression is entered in this way, you'll notice that the selection fields below update to match the expression. If you are NOT familiar with regular expressions, don't worry! You can simply ignore this field and continue building your schedule using selection options.
3
Expression
With the advanced checkbox selected, you can enter a regular expression directly. Otherwise, this field updates automatically as you make schedule selections.
4
Minutes, hours, days
By default, these fields are set to reflect whatever preset is selected. You can change these as needed.
5
Months & days of week
By default, all months and all days of the week are selected (so the service would run every day of the week, every month of the year). You can check/uncheck these fields as needed.
6
Updated schedule
This field updates automatically, showing any selections as a regular expression - it cannot be changed manually.
7
Summary
A summary if your schedule settings is displayed in readable text form, so you can confirm that your selections are correct.
Trigger webhook
Trigger webhook options are used to trigger the associated service to run when a defined webhook receives events.