
Mapping metafields for products (services)
Introduction
The approach for mapping metadata fields associated with products differs from standard mappings.
Typically, field mappings are defined from a source system to the required destination. The same applies to metadata fields except we don't specify source mappings. Instead, we configure the required Patchworks service(s) to inject metadata from the source data, into your mapped destination fields. In other words, you only need to define destination mappings for metadata fields - the source side is taken care of automatically.
This advanced task requires an understanding of JSON files and data structures.
The steps required to map metadata fields are summarised below:
Identify your metadata fields
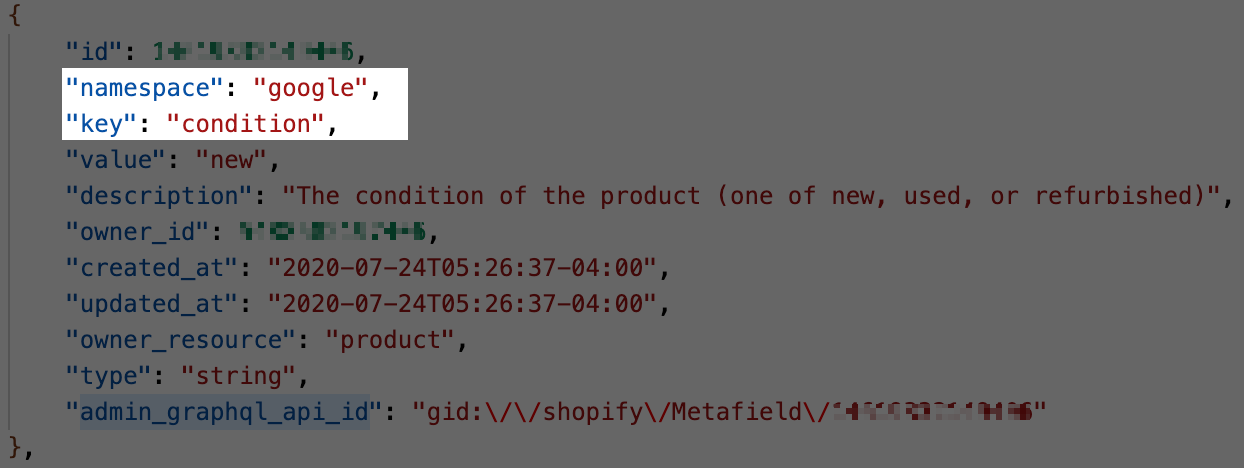
You'll need to know the names (or keys) for your required metadata fields, and the namespace that they belong to. For example:
How you obtain this information varies, depending on your source system. If you are an advanced editor, and comfortable working with JSON files for your data, it's very likely that you'll already have this information to hand.
Shopify example
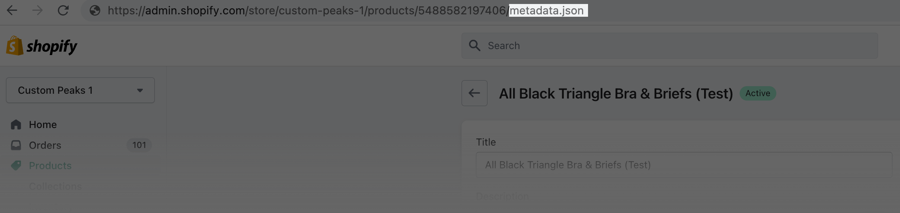
In Shopify you can access a sample entity (e.g. a product or an order) in the Shopify admin console and then append the following to the URL:
For example:
Press Enter to see related metadata details for this record:
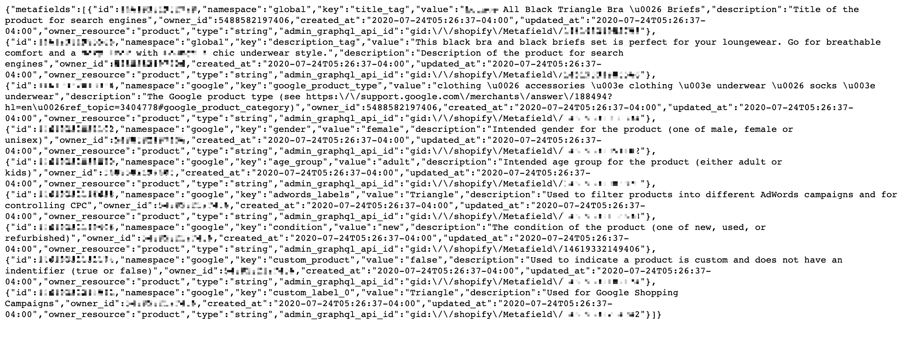
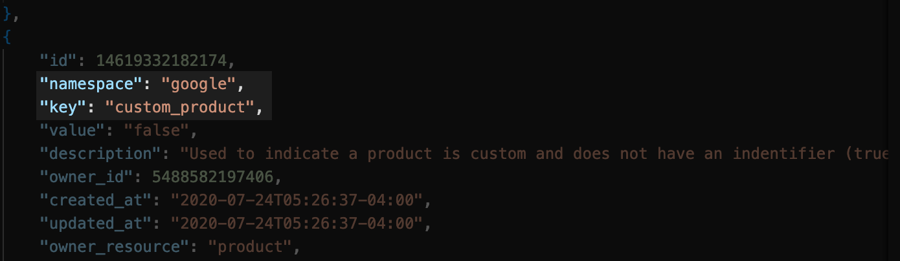
...paste this into a code editor for readable formatting:
Set the inject metadata option for the service source
In Patchworks, an inject metadata option must be 'switched on' for whichever service(s) you run to sync data between systems. To do this, follow the steps below:
Step 1 Log in to the Patchworks dashboard and select services from the left-hand navigation menu.
Step 2 Select the service that you wish to update and click the source tab. Information for the source system is displayed - for example:
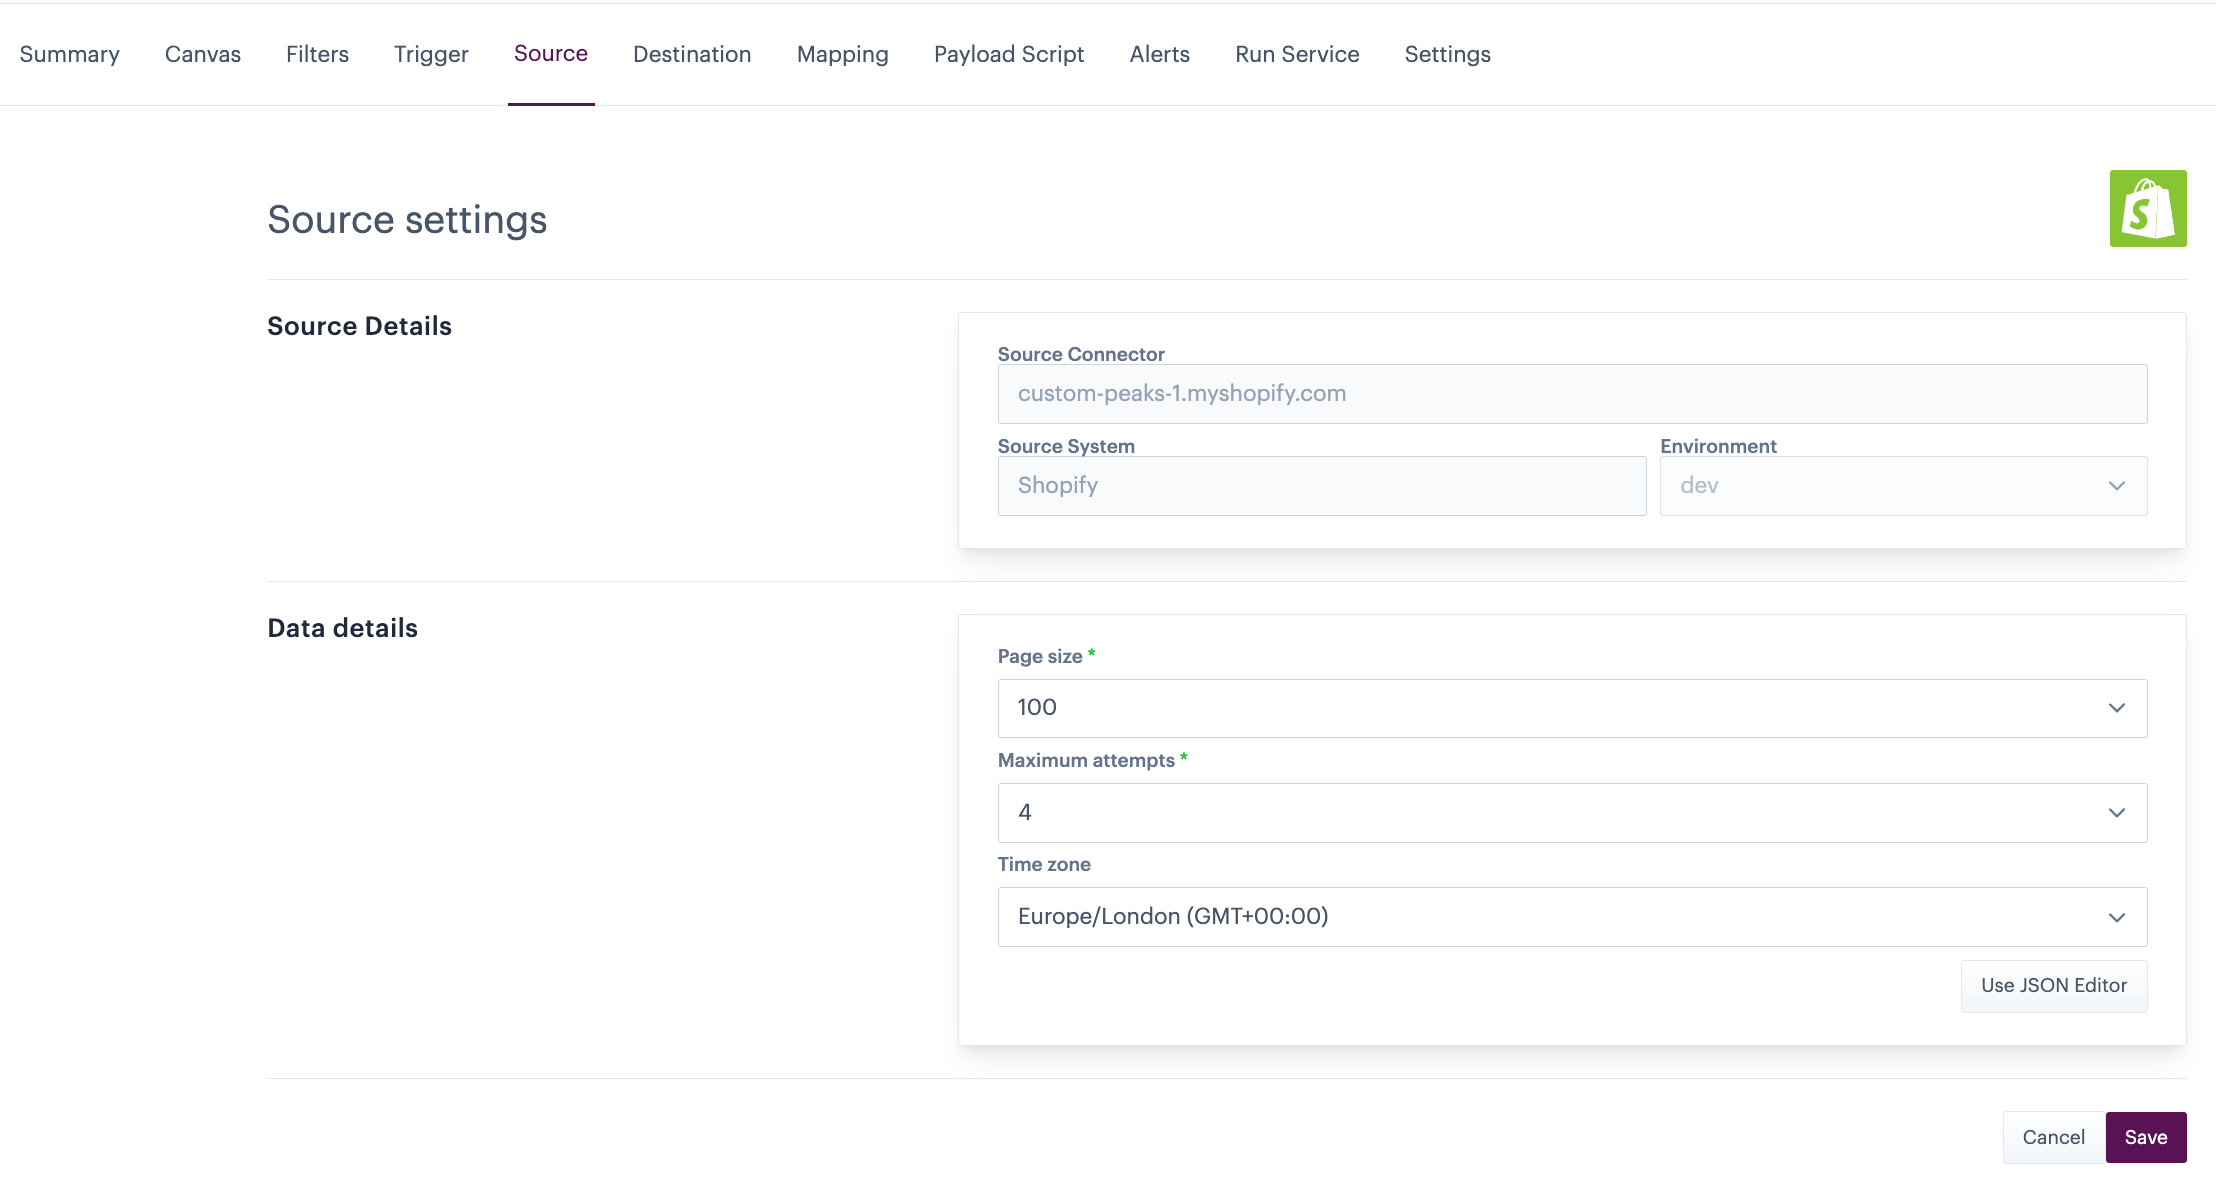
Step 3 Click the use JSON editor button and make sure that the following line is present:
If this line isn't present, add it now. If it's present but set to false, change it to true.
Step 4 Save changes and go straight to the steps below.
Confirm the mapping path for destination fields
We will be mapping metadata fields manually via the JSON editor. Before that, it's useful to check the field mapping UI to confirm the dot notation path for the required destination fields. To do this, follow the steps below.
Step 1 Click the mappings tab for the service.
Step 2 Choose to add new row.
Step 3 On the right-hand side, click the destination field and search for the first field that you wish to define as a destination for a metadata field. Typically, 'attribute' fields are used for this purpose:
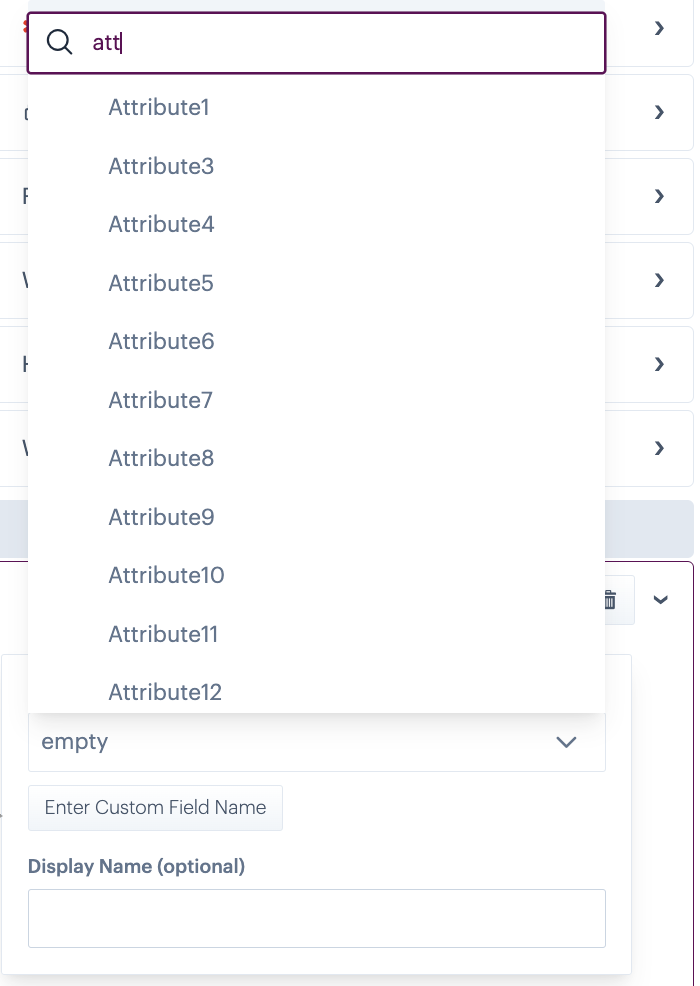
As you navigate this hierarchy, note the path to the required field(s). In our example, attributes are not nested but yours may vary (e.g. products.0.Attribute1). In the case of our example there is no hierarchy - the attribute fields are at the top level.
Step 5 Having noted all required field paths, cancel the new row and go straight to the steps below.
Define destination mappings
Step 1 Click the advanced editor button at the top of the mappings page.
The advanced editor button is only displayed if your user account is defined with additional advanced editor permissions. If you are familiar with editing JSON files and require access to this option, please contact Patchworks support.
Existing mappings for this service are displayed - source mappings are on the left and destination mappings are on the right. For example:
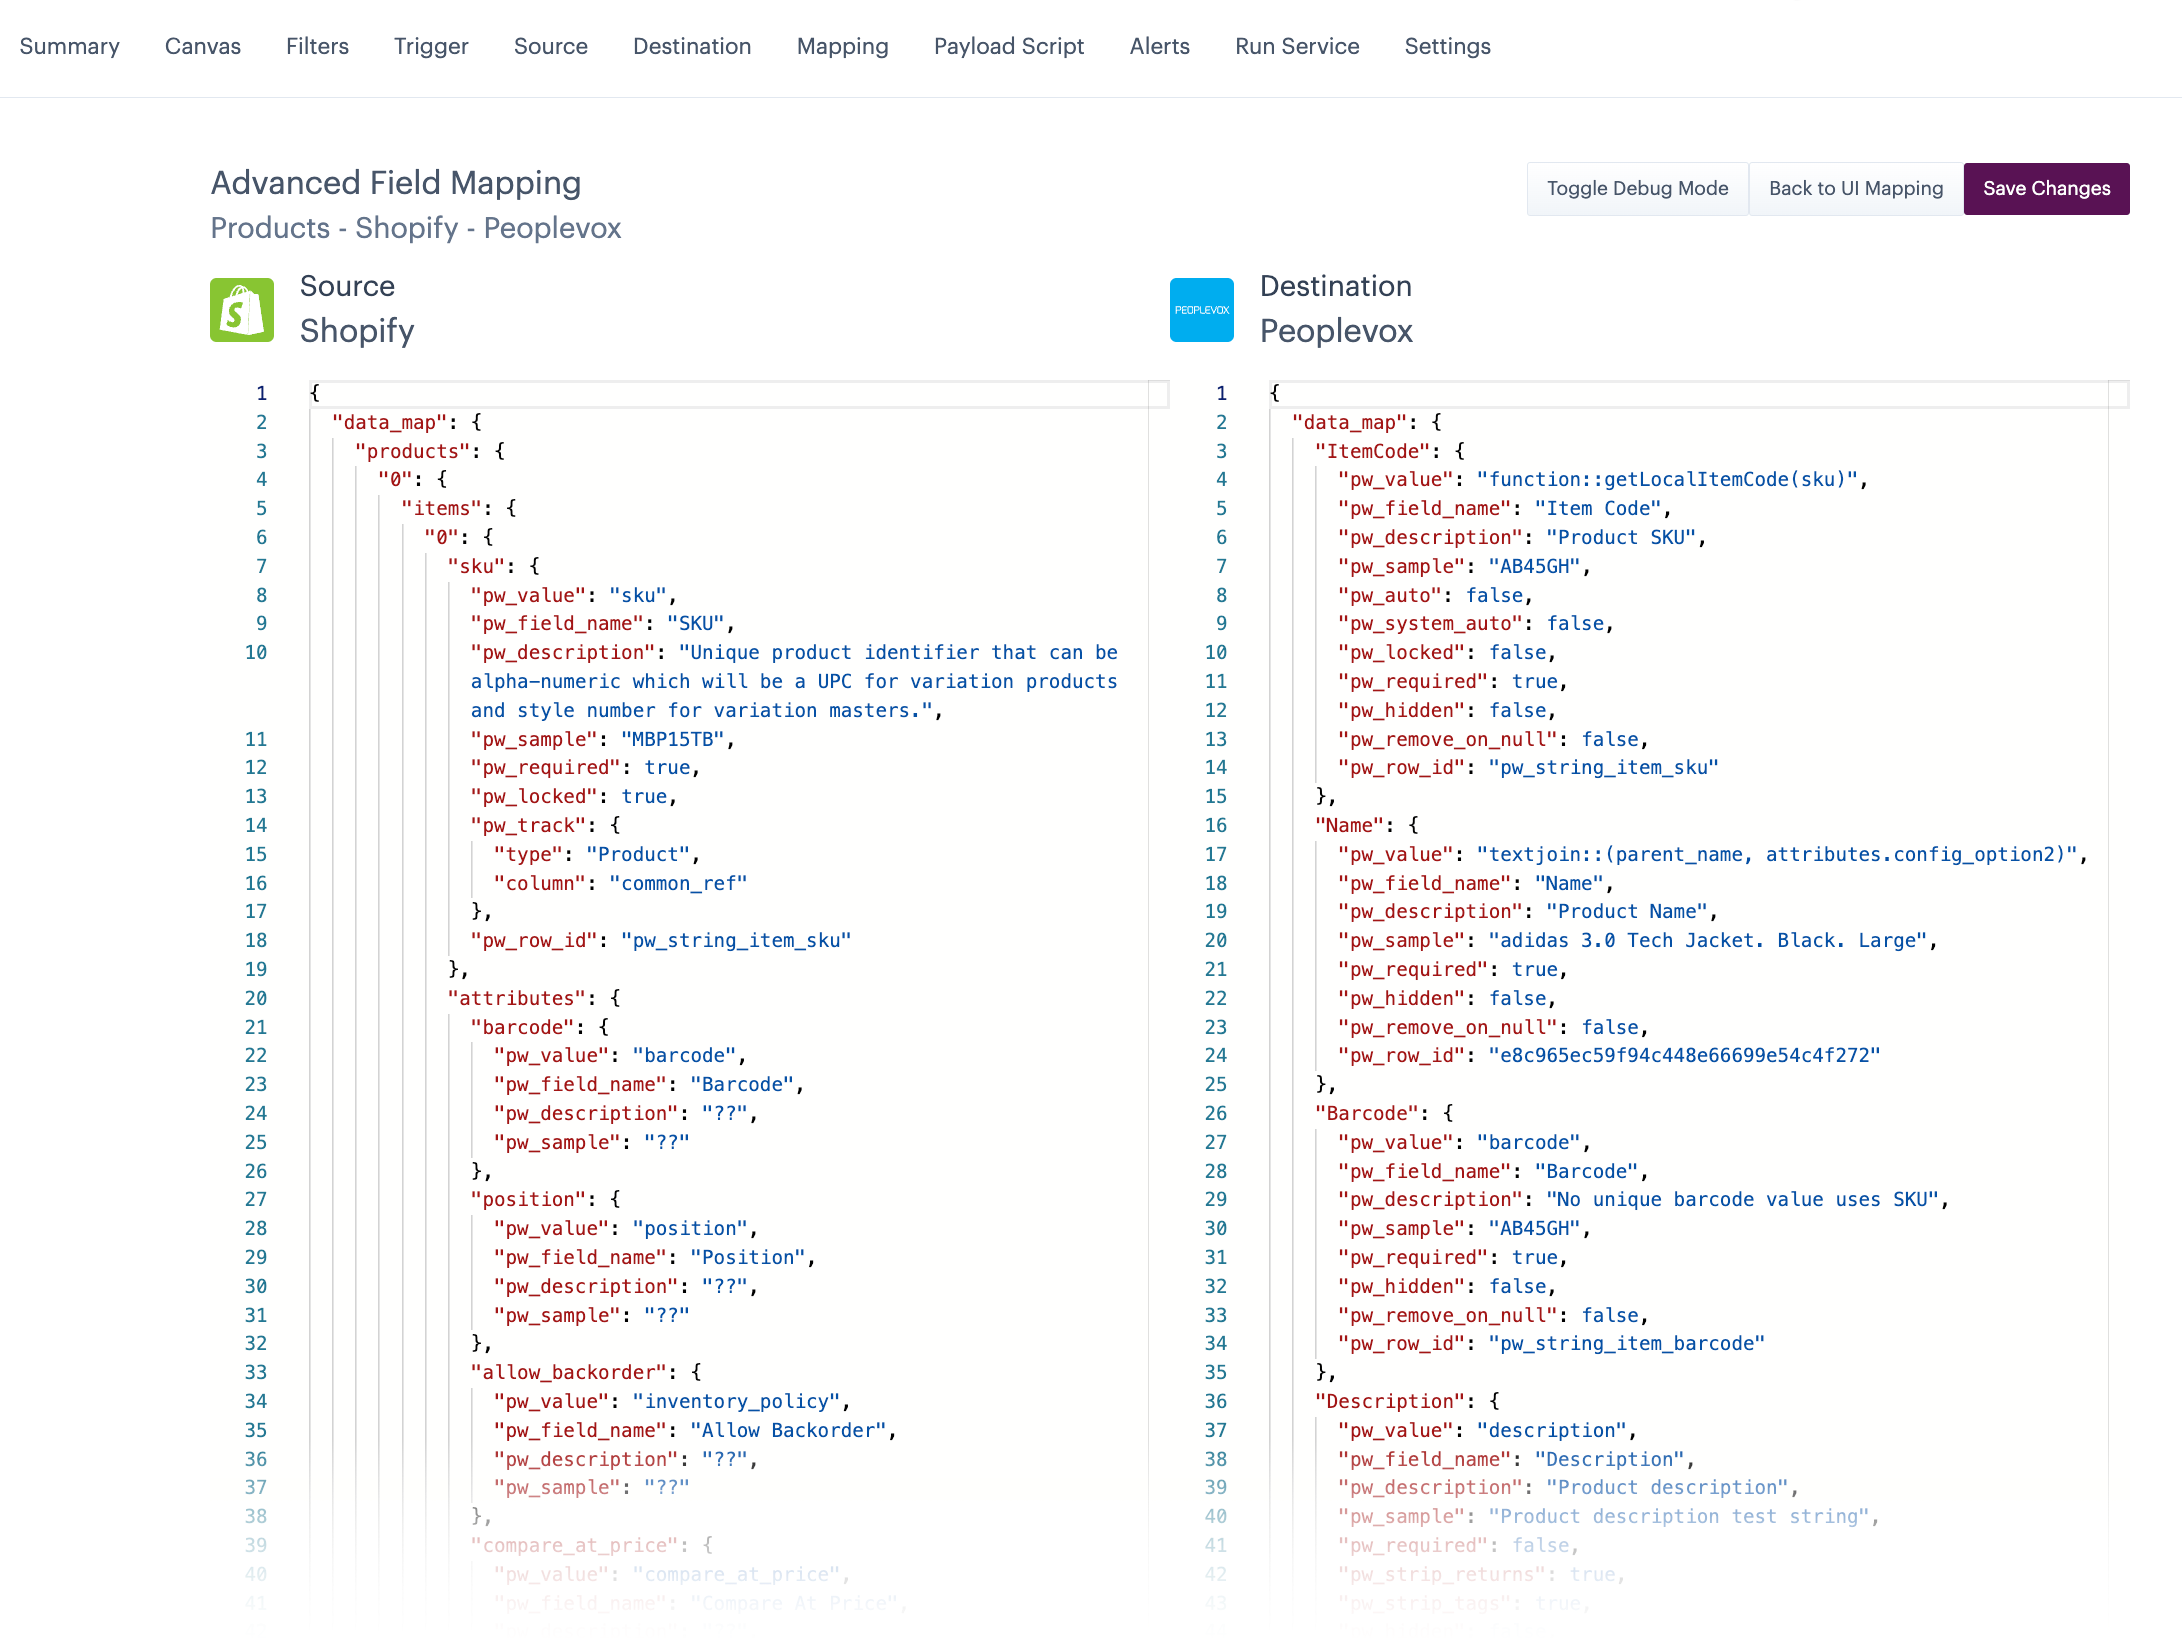
Step 2 For metadata fields, we only need to define destination mappings. When the service runs, any metadata found in the source data is injected into these destination fields.
Scroll to the bottom of the destination pane and add an entry for each required metadata item. The required format is shown below:

The elements here are summarised below:
path to destination field
The dot notation path to the required destination field for this metadata item.
attributes
This is a static value - it should always be included.
namespace
The namespace that this metadata item belongs to (as noted earlier).
metafield
The metadata item to be injected into this field
This is where the paths that you noted previously may be needed. Often, you will find that the default mapping file already includes the fields that you require - especially is you are injecting metadata into attribute fields. In this case, all you need to do is update pw_value entries for each metadata item.
However, if your required destination fields are NOT already present, you should add them using the syntax shown above. For example:
When defining metadata mapping entries, you only need the pw_value.
Step 3 Save the mapping file. Next time this service is run, metadata items will be injected into your mapped destination fields.