> For the complete documentation index, see [llms.txt](https://doc.wearepatchworks.com/product-documentation/llms.txt). Markdown versions of documentation pages are available by appending `.md` to page URLs; this page is available as [Markdown](https://doc.wearepatchworks.com/product-documentation/developer-hub/connector-builder/building-your-own-connector/3-authentication-methods/authentication-method-options/auth-variables.md).
# Auth variables
## Introduction
The **auth variables** tab is used to define authentication variables for any values that you need users to provide when they choose to [add an instance](/product-documentation/connectors-and-instances/working-with-instances/adding-an-instance.md) of this connector, for use in [process flows](/product-documentation/process-flows/about-process-flows.md):
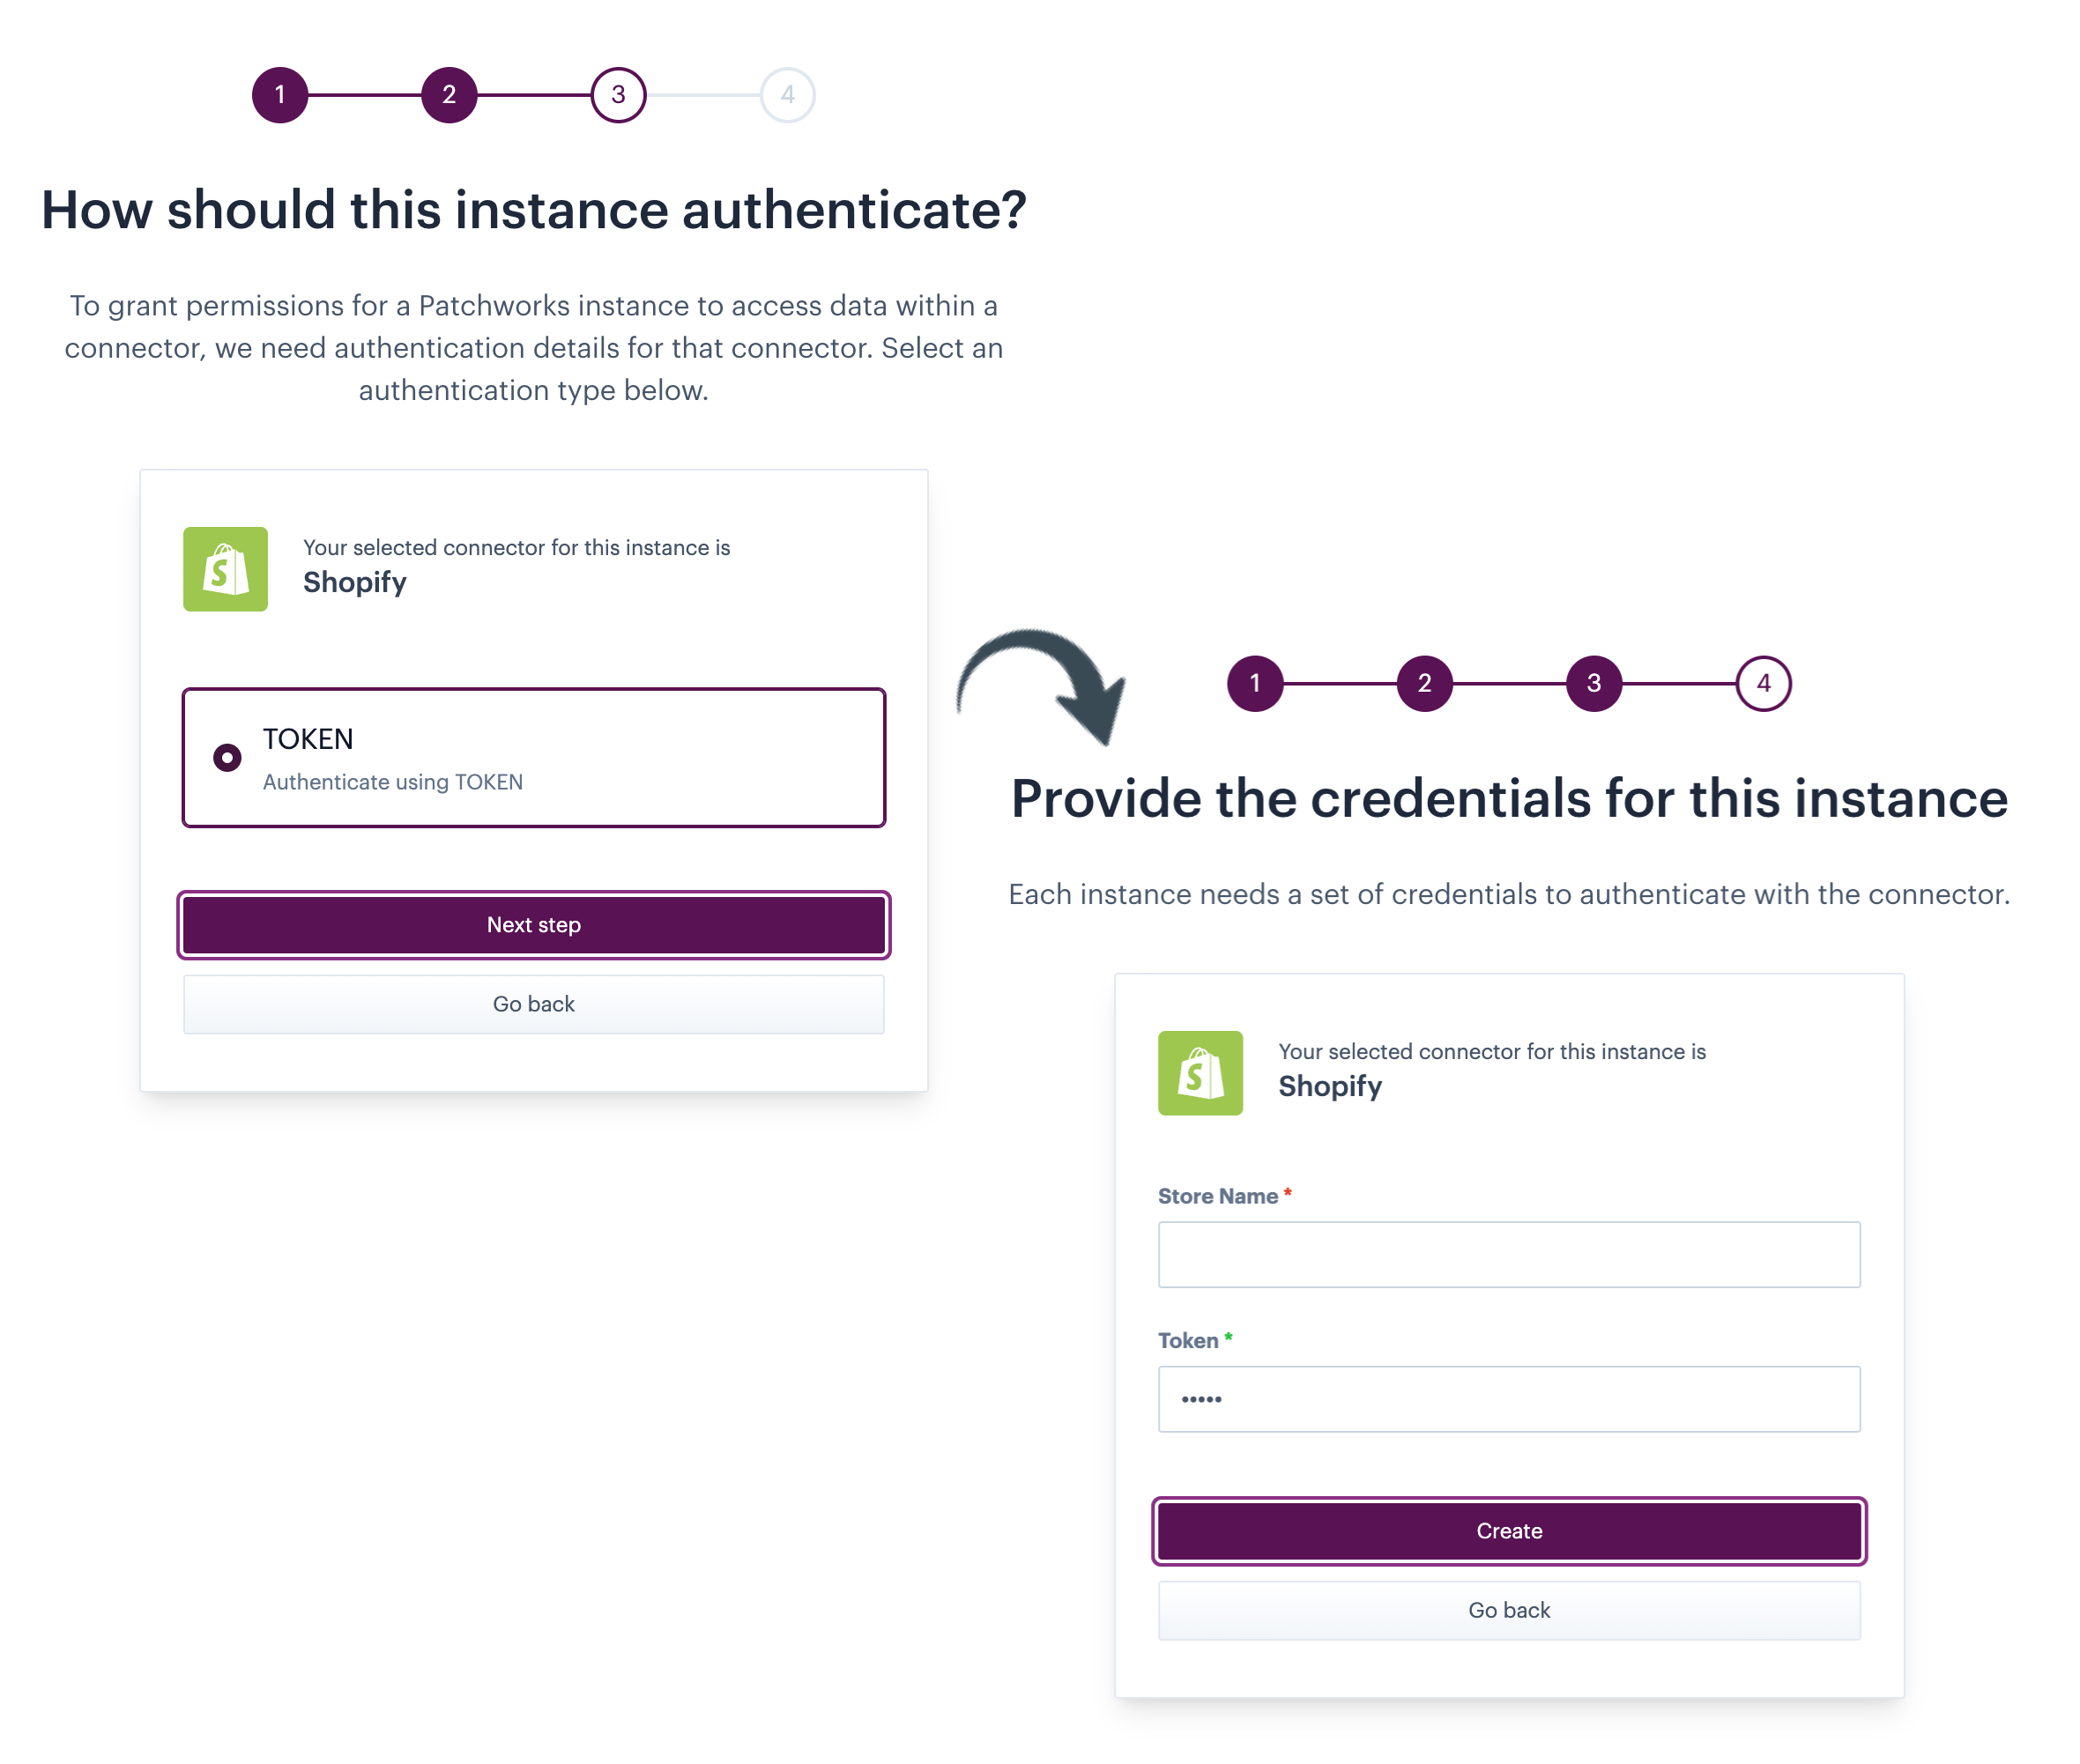
Here, you define what fields a user will be asked to complete when they choose to [add an instance](/product-documentation/connectors-and-instances/working-with-instances/adding-an-instance.md), select and authentication method, and provide credentials. For example:
You also define how any provided values are passed in authentication requests - i.e. are they included in the API request URL, the header, or the body?
{% hint style="danger" %}
Never hardcode authentication credentials - always set them up as secret auth variables, to be added by users [when instances of the connector are created](/product-documentation/connectors-and-instances/working-with-instances/adding-an-instance.md).
{% endhint %}
## Default auth variables
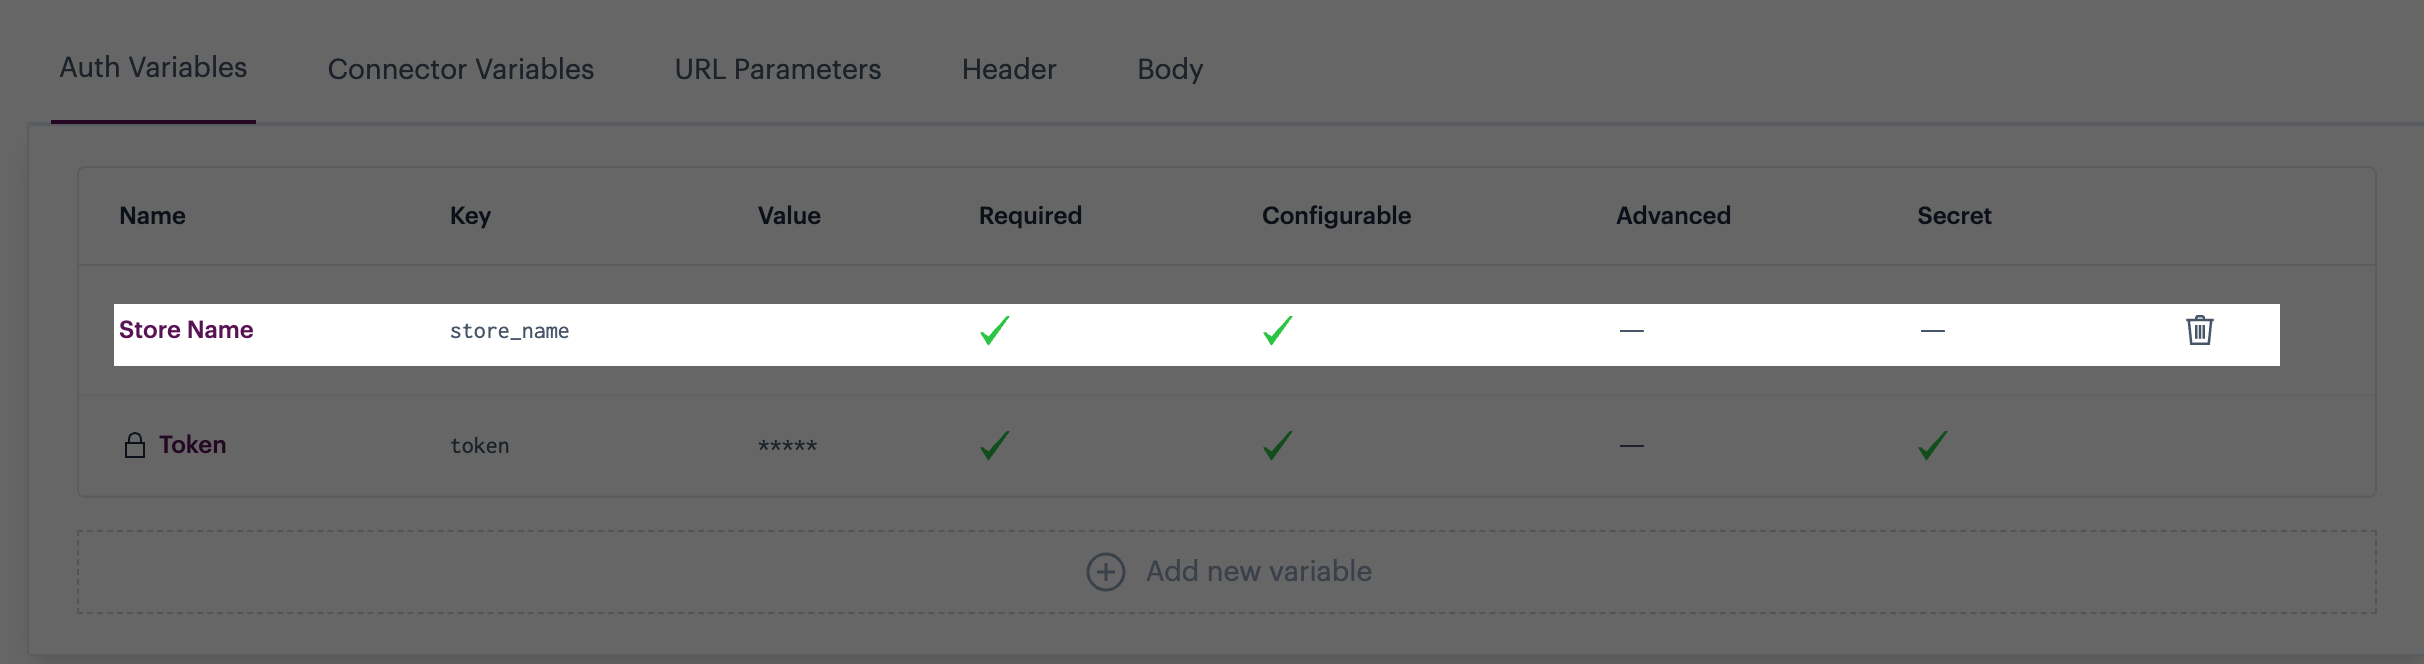
Having [chosen an authentication method to configure](/product-documentation/developer-hub/connector-builder/building-your-own-connector/3-authentication-methods.md), any required variables for that method are listed by default - for example:
These are variables that are always required to authenticate using this authentication method. You can't remove or change the behaviour of these variables, but you can change the **display name** if required.
{% hint style="info" %}
The **display name** is the name that users will see for this variable field, when they are [adding an instance](/product-documentation/connectors-and-instances/working-with-instances/adding-an-instance.md) of this connector.
{% endhint %}
Show me

Default **auth variables** are pre-configured to be passed into API requests as needed. For example, [token-based authentication](/product-documentation/developer-hub/connector-builder/building-your-own-connector/3-authentication-methods/supported-authentication-types/token-based-authentication/configuring-token-based-authentication.md) has one default parameter, which is pre-configured on the [header](/product-documentation/developer-hub/connector-builder/building-your-own-connector/3-authentication-methods/authentication-method-options/header.md) tab. If your requirements are different, you can change how/where these variables are used.
## Adding auth variables
To add an auth variable, follow the steps below:
**Step 1**\
Start by selecting the **connector variables** tab to check if there are any [instance-level variables](/product-documentation/developer-hub/connector-builder/building-your-own-connector/2-connector-variables.md) for this connector that you want to include. Any variables defined for the instance as a whole are shown here - click the **use** button for any that you wish to include as an **auth variable** - for example:
When you choose to **use** a **connector variable**, you'll see that it gets added to the **auth variables** tab - for example:
Show me

**Step 2**\
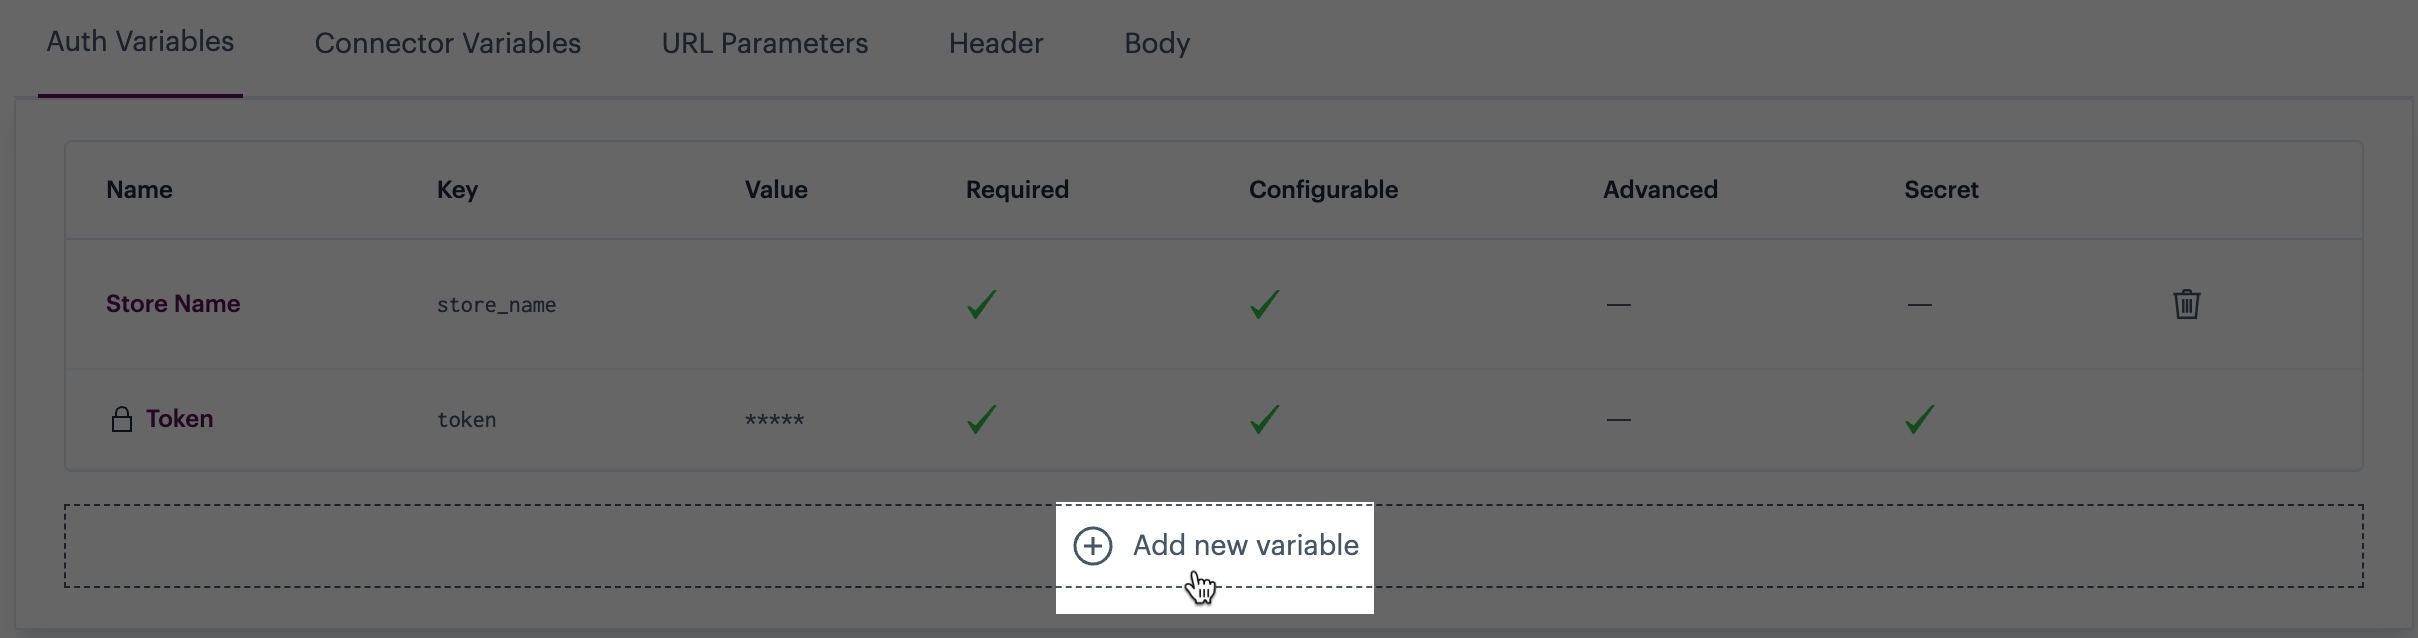
Back in the auth variables tab, you can now add any other variables for information that you need to provide when they add an instance of this connector with this authentication method. To do this, click the **add variable** button:
**Step 3**\
Complete details and set options on the [add variable page](/product-documentation/developer-hub/connector-builder/building-your-own-connector/techniques-for-working-with-variables-and-parameters/working-with-variables.md):
What can I enter here?
The API documentation for the underlying third-party application should provide guidance about what variables can/should be passed in authentication requests. The example below is from [Shopify's API documentation](https://shopify.dev/docs/api/admin-rest/2023-04/resources/customer#get-customers-customer-id):
The **add variables** page is the same for all types of variables that you may encounter in the connector builder (for information about these options please see the [Working with variables](/product-documentation/developer-hub/connector-builder/building-your-own-connector/techniques-for-working-with-variables-and-parameters/working-with-variables.md) page). However, it's worth noting the effect of setting required and configurable by user options in the context of **auth variables**:
* When you add an **auth variable** and choose to make it **required**, you are effectively saying: '*When a user adds an instance of this connector, do not allow them to proceed without providing a value for this variable'.*
* When you add an **auth variable** and choose to make it only **configurable** **by users**, you are effectively saying: '*When a user adds an instance of this connector, allow them to provide a value for this variable if they have one but if they don't, let them proceed'.*
**Step 4:**\
Click the **save** button.
**Step 5**\
Having added a variable, make sure that you go on to define how any values captured for it should be passed in API requests. Typically, any user-provided variable that you define here would then be added to the [authentication request URL path](/product-documentation/developer-hub/connector-builder/building-your-own-connector/3-authentication-methods.md), [authentication request URL parameters](/product-documentation/developer-hub/connector-builder/building-your-own-connector/3-authentication-methods/authentication-method-options/url-parameters.md), the [authentication request header](/product-documentation/developer-hub/connector-builder/building-your-own-connector/3-authentication-methods/authentication-method-options/header.md), or the [authentication request body](/product-documentation/developer-hub/connector-builder/building-your-own-connector/3-authentication-methods/authentication-method-options/body.md) for the authentication method.
How do I know where to put these variables?
The API documentation for the underlying third-party application should provide guidance about where/how authentication variables need to be passed in requests. The example below is from [Shopify's API documentation](https://shopify.dev/docs/api/admin-rest#authentication):
{% hint style="warning" %}
If you add **auth variables** which require user-provided values but don't go on to add them to the authentication method's [request URL path](/product-documentation/developer-hub/connector-builder/building-your-own-connector/3-authentication-methods.md), [header](/product-documentation/developer-hub/connector-builder/building-your-own-connector/3-authentication-methods/authentication-method-options/header.md), or [body](/product-documentation/developer-hub/connector-builder/building-your-own-connector/3-authentication-methods/authentication-method-options/body.md) the result will be that users are prompted to provide these details (if you [chose to display these variable fields to users](/product-documentation/developer-hub/connector-builder/building-your-own-connector/techniques-for-working-with-variables-and-parameters/working-with-variables.md#adding-managing-variables)), but no action will be taken with that information.
{% endhint %}
{% hint style="info" %}
**Default** **auth variables** (i.e. those which are displayed as soon as you add a new authentication method) are pre-configured to be passed into API requests as commonly needed. For example, [token-based authentication](/product-documentation/developer-hub/connector-builder/building-your-own-connector/3-authentication-methods/supported-authentication-types/token-based-authentication/configuring-token-based-authentication.md) has one default parameter, which is pre-configured on the [header](/product-documentation/developer-hub/connector-builder/building-your-own-connector/3-authentication-methods/authentication-method-options/header.md) tab. You can change where these are passed if needed.
{% endhint %}
{% hint style="info" %}
In the Patchworks connector builder, variables must be defined in double curly brackets.
{% endhint %}


 Show me

 What can I enter here?